
Ever since reading Prospero Burns by Dan Abnett I’ve been really interested in the tragic story of the Thousands Sons Legion and their misguided Primarch Magnus the Red. GW put out an amazing model of him and I was excited to pick one up for my next project.
Pt. 1/2
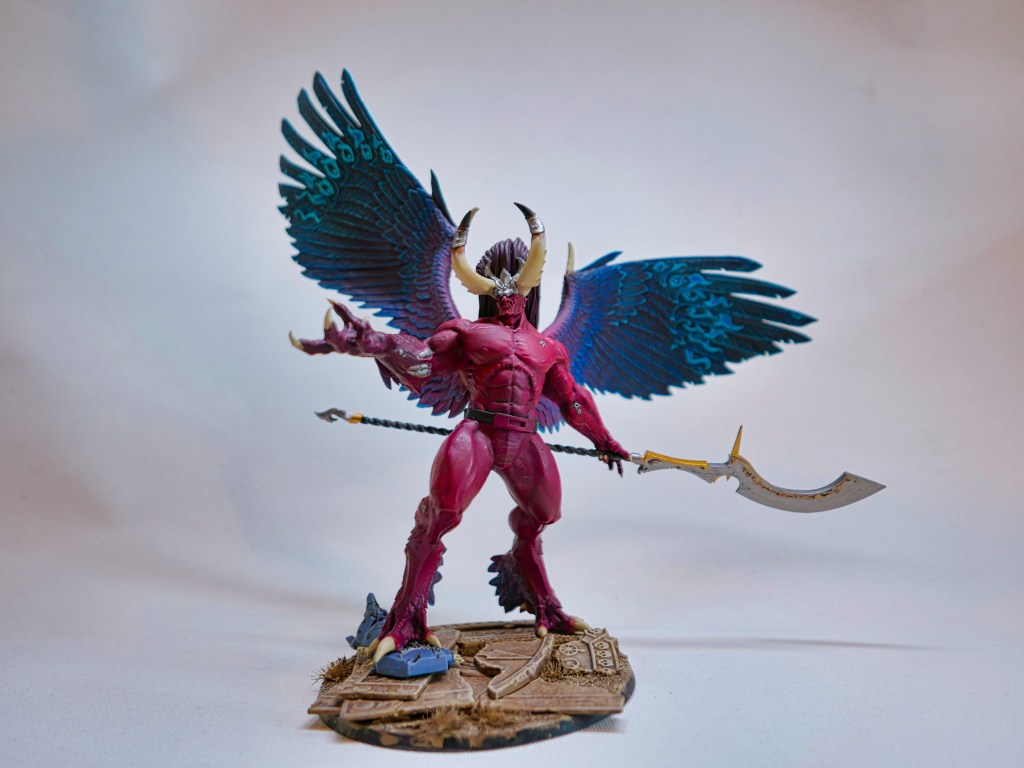
A stunning model, Magnus truly embodies the scale and power of a Primarch. I think GW really did a great job capturing the lord of the Thousand Sons in an appropriate pose; I imagine he’s in the midst of tapping into the powers of the immaterium to bring to bear on some unlucky Wolves of Fenris.
I decide to follow GW’s painting guide pretty closely, with only a few deviations, since I thought the color scheme was very well done.
Note: I highly recommend assembling Magus without his armor on, and painting that separately. You really want to get fully coverage over the body and feathers with your drybrush and I can’t imagine doing this cleanly with all the armor on.
The Body

Step 1: Chaos Black (Spray) Undercoat the entire model
Step 2: Screamer Pink (Base) Base coat the entire body, bringing the color up onto the wings about 1/3 of the way
Step 3: Wazdakka Red (Base) Drybrush the raised and flat areas of the entire body. For the wings, focus on the transition point between the remaining Chaos Black and the Screamer Pink we painted in the prior step
Step 4: Carroburg Crimson (Shade) Shade the entire body but avoid the wings, ensure it does not pool over the larger flat areas of flesh
Step 6: Wazdakka Red (Layer) Drybrush the raised and flat areas of the entire body. Take a little more care this time around not to get the brighter red into the recesses you just shaded
Step 5: Druchii Violet (Shade) Shade the outstretched hand and both of the feet. Feather the shade as it travels towards the arm / upper legs so that there’s a nicer transition from the purple to red areas
Step 6: Pink Horror (Layer) Highlight the edges and other raised details of the skin. This should be easy as the previous drybrushing will have highlighted these areas already
Step 7: Druchii Violet (Shade) Shade over the previously-shaded Druchii Violet areas (feet and outstretched hand) to bring that color out a little more and tone down the Pink Horror
Step 8: Emperor’s Children (Layer) Carefully edge-highlight the sharpest areas and details including the face, fingers etc.
The Wings

Step 1: Abaddon Black (Base) Use the black to clean up the area beyond the transition point between the red area and the black; about 1/3 of the way up the wing from the body you’ll see a edge or step in the model, this is the line we’re trying to preserve. Paint the remainder of the wings black up to this line
Step 2a: Kantor Blue (Base) Heavily drybrush along the transition point between the red and the black. We’re trying to ease the transition between the two colors.
Step 2b: Kantor Blue (Base) Drybrush along the red feathers at the base of the wings, but also at the wings on the arms and feet as well.

Step 3: Thousand Sons Blue (Layer) Drybrush over all of the wings, including his arms and legs
Step 4a: Ahriman Blue (Layer) Drybrush over all of the wings, including his arms and legs.
Step 4b: Ahriman Blue (Layer) Paint in the patterns towards the ends of the wing tips
Step 5: Baharroth Blue (Layer) Drybrush over just the tips and edges of the wings, being very light with this color as it’s quite bright and we only want it on the sharpest edges
The Base
I thought it would be fun to customize Magnus’ base a little more. The model comes with him already stepping over a dreadnaught arm, but I though it’d be fun to include some rubble remains of a temple on Prospero, suggesting we’re seeing Magnus the Red in his last few desperate moments on his home-world.
The pieces were taken from the Shattered Dominion Large Base Detail Kit.

Step 1: Arrange / glue your various pieces of terrain down in the manner that looks good to you. Ensure Magnus will have a level place to plant both of his feet before you glue everything however so he doesn’t look awkward standing on a teetering edge or at an odd angle.
Step 2: Agrellan Badland (Technical) Scrape the technical paint into all the recesses and flat areas around the fallen stonework to give it a little more texture. I also placed several tufts of hobby fauna to liven it up a bit more.
Step 3: Zandari Dust (Spray) Undercoat the entire base
Step 4: Agrax Earthshade (Shade) Shade over the entire base
Step 5: Ushabti Bone (Layer) Drybrush over the entire base
Step 5: Screaming Skull (Layer) Drybrush lightly over the entire base
